BCX Network Managements Tools v2.0 - User Guide
DRAFT COPY OF USER MANUAL TO BE COMPLETED
Last Updated January 2011
Contents Page
Management Tools Overview
0.0 - BCX Management Tools Overview
Shortcut Management
1.0 - Shortcut Management Overview
1.5 - Copying/duplication of Assignments
Package Tasks
2.2 - Create a Custom Package Task
2.4 - Edit Package Task Assignments
2.5 - View Package Task Status
2.6 - Linking Package Task Assignments to a Shortcut
2.7 - Uninstalling a Package Task
2.10 - View Pending Package Tasks
Printer Tasks
3.2 - Edit Printer Task Options
3.3 - Edit Printer Task Assignments
3.4 - Default Local Printer (Custom Default)
Wallpaper Tasks
4.2 - Edit Wallpaper Task Options
4.3 - Edit Wallpaper Task Assignments
Startup Shutdown Tasks
5.0 - Startup Shutdown Task Overview
5.1 - Create a Startup Shutdown Task
5.2 - Edit Startup Shutdown Task Options
5.3 - Edit Startup Shutdown Task Assignments
5.4 - Delete a Startup Shutdown Task
5.5 - Testing a Startup Shutdown Task
Users and Computers
6.0 - Users and Computers Overview
6.1 - Create and Edit Templates
6.13 - Enable/Disable Accounts
Station Information
7.0 - Station Information Overview
7.1 - Searching by Name, Serial and MAC
7.2 - View Station Package Tasks and Logs
7.3 - Station Information - View Logon History
User Information
8.0 - User Information Overview
8.1 - User Information - View Logon History
8.2 - User Information - Reset Logon Statistics
8.3 - User Information - AD Properties
Logon History
9.1 - View Station Logon History
9.4 - Configure Logon History Period
9.5 - Export Logon History to CSV
Create Package Wizard
10.0 - Package Wizard Overview
10.1 - Create a Package using the Package Wizard
10.1 - Edit the Services List for the Package Wizard
Logon Modeling Wizard
11.0 - Logon Modeling Overview
11.1 - Run a Logon Modeling Simulation
Auto Naming
12.1 - Enable/Disable Auto Naming
12.2 - Manually Setting and Clearing netBoot GUID
Disk Quota
Appendix 1
14.1 - Backup/Restore Database
0.0 - Mangement Tools Overview
The BCX Management Tools are split down into 8 key functions seperated by tabs:
- Shortcut Management
- Package Tasks
- Printer Tasks
- Wallpaper Tasks
- Startup and Shutdown Tasks
- Users and Computers
- Station Information
- User Information
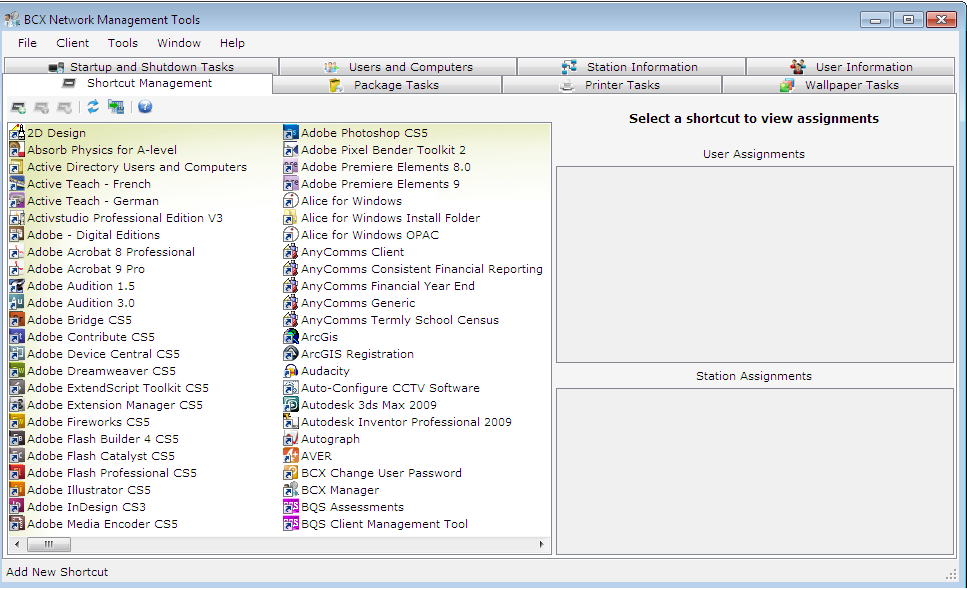
1.0 - Shortcut Management Overview
The Shortcut Management Tool can be used to distribute shortcuts to your users and stations Start Menus and Desktops.
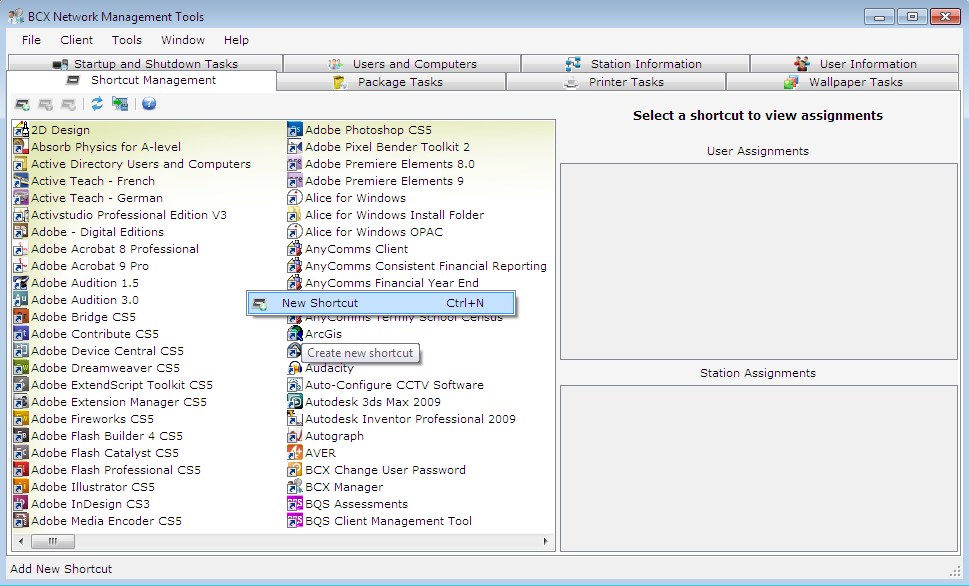
1.1 - Importing Shortcuts
Right click in open space in the left hand pane and select "New Shortcut". It is also possible to Drag and Drop shortcuts from windows explorer to this window.
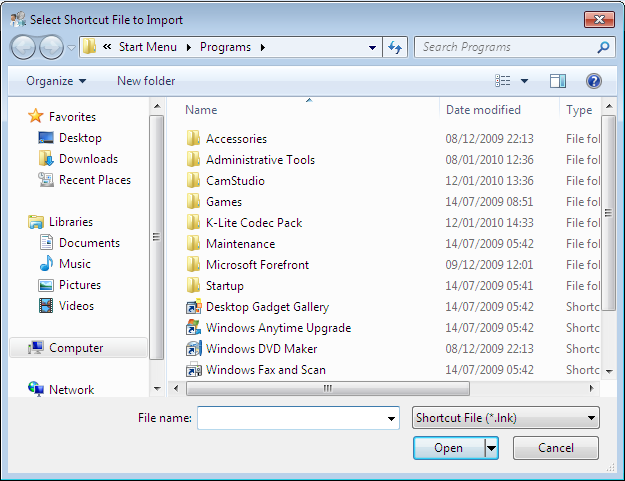
In the dialouge box that appears, select the application you wish to creat a shortcut to by double clicking, or selecting it and the click "Open".
Now change any details if required.
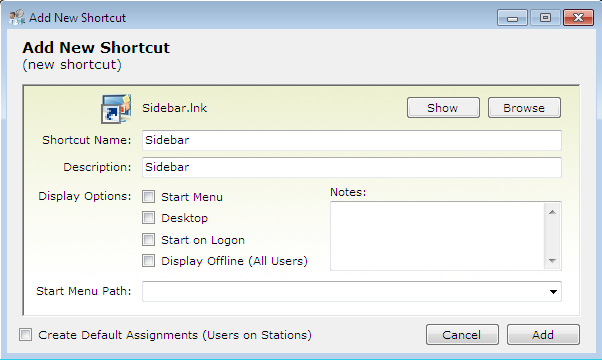
| Shortcut Name | This is the Shortcut Name displayed in the BCX Management Console |
| Description | This is the text that will be displayed along with theicon on client machines |
| Start Menu Tick Box | Select if you wish this shortcut to appear on the Start Menu |
| Desktop Tick Box | Select if you wish this shortcut to appear on the Desktop |
| Start on Logon Tick Box | Select if you wish this shortcut to AutoStart when the user logs in |
| Display Offline Tick Box | Select if you wish to allow user access when not connected to LAN |
| Start Menu Path | Use this to display shortcuts within sub groups on the Start Menu, you can either select from the drop down menu or type in a new group e.g. Microsoft Office |
| Create Default Assignments | Select this if you wish to auto assign the shortcut to your default users and stations. The defaults were set at installation but can be change from the Tools menu at any time |
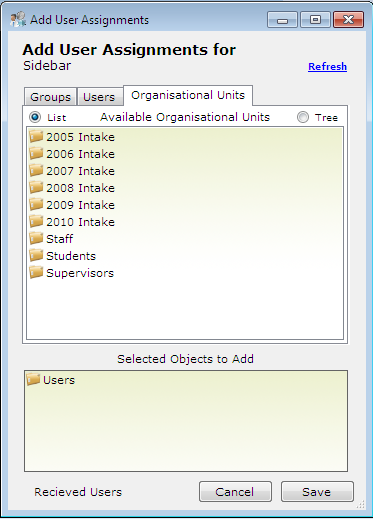
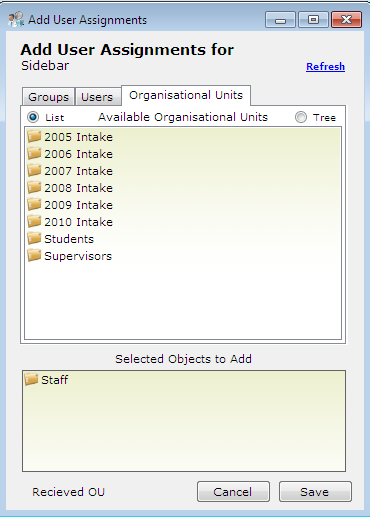
After clicking "Save" you will be presented with a dialouge box where you can assign the shortcut you just created to Users. Shortcuts can be assigned to OU's, Users or Groups. Double click the object you wish to assign this shortcut to and it will move into the bottom "Selected Obhects to Add" pane. Once you have made your selections click "Save".
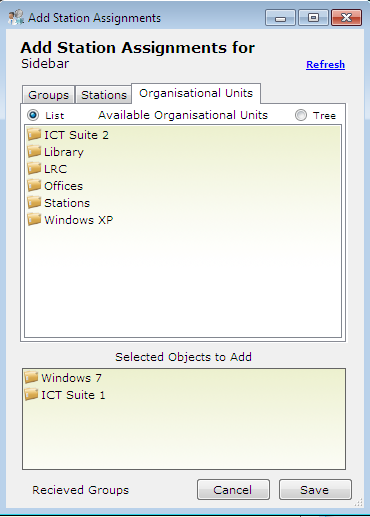
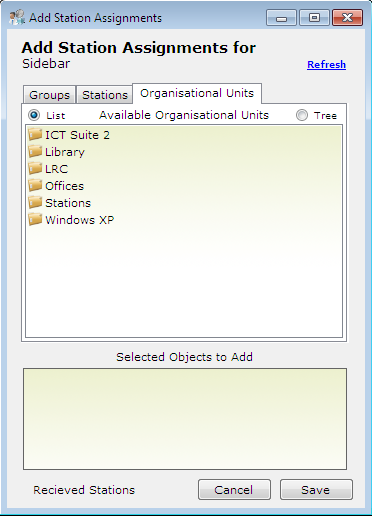
Finally the Add Station Assignments dialouge will appear, this time we have the option of OU's, Stations and Groups. Double click the object you wish to assign this shortcut to and it will move into the bottom "Selected Obhects to Add" pane. Once you have made your selections click "Save".
The new shortcut will now appear in the Shortcut Management Tab. display pane.
1.2 - Editing Shortcut Options
After creating a shortcut and making initial user and station assignments you may in some situations wish to edit these so that different stations or users see the shortcuts.
To edit shortcut assignments complete the following steps
1 - Make sure you have the Shortcuts tab selected in BCX
Management Tools.
In the right hand panes you will see the current user and station assignments.
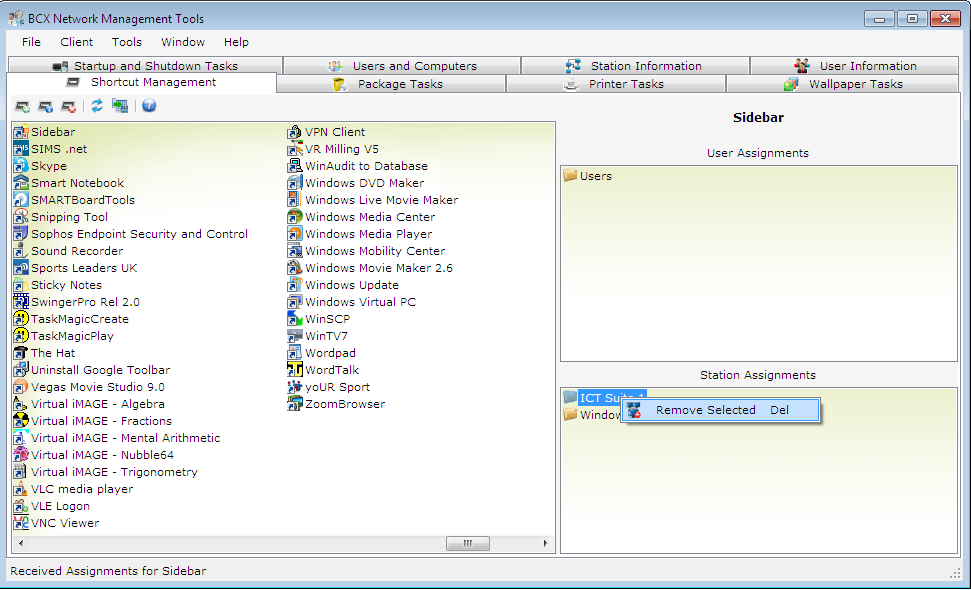
2 - To remove a user assignment simply right click on the OU, group or user you wish to remove and select "Remove Selected"..
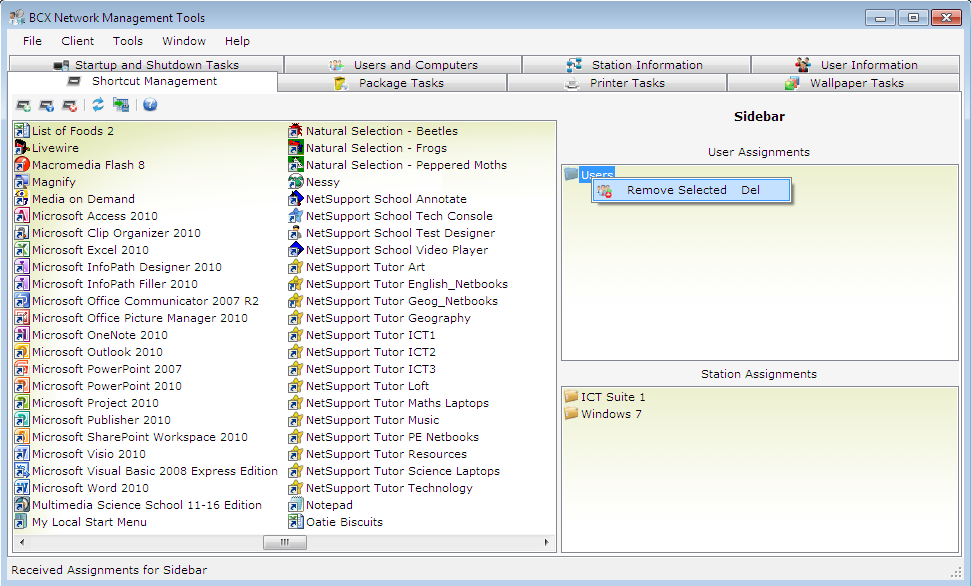
3 - To remove a Station assignment simply right click on the OU, group or Station you wish to remove and select "Remove Selected".
4. To assign a shortcut to additional users, right click in the blank space in the "User Assignments" pane..
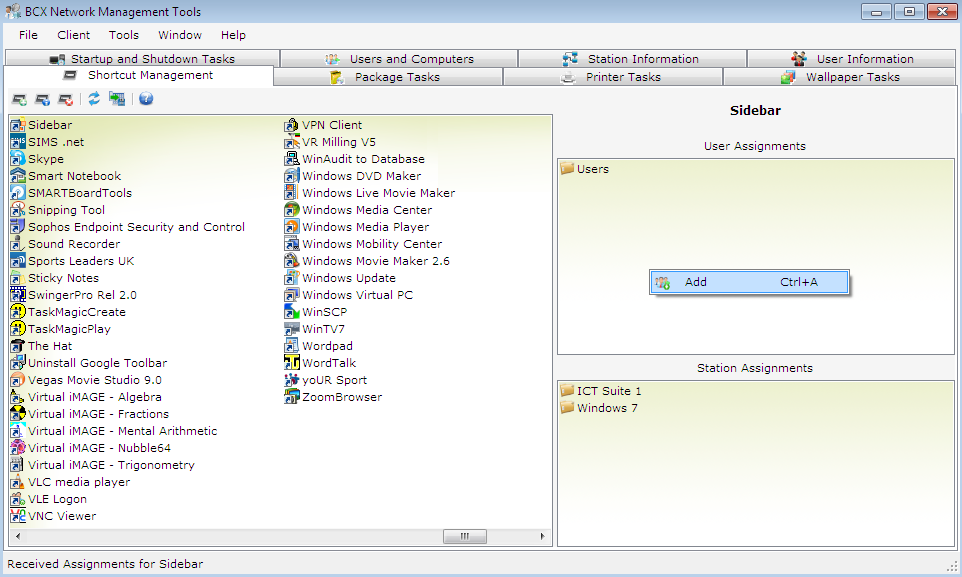
5. In the box that appears double click the OU, User or Groups you wish to assign the shortcut to so that they move to the bottom pane. Once all selections have been made, click "Save".
6. To assign a shortcut to additional stations, right click in the blank space in the "Station Assignments" pane..
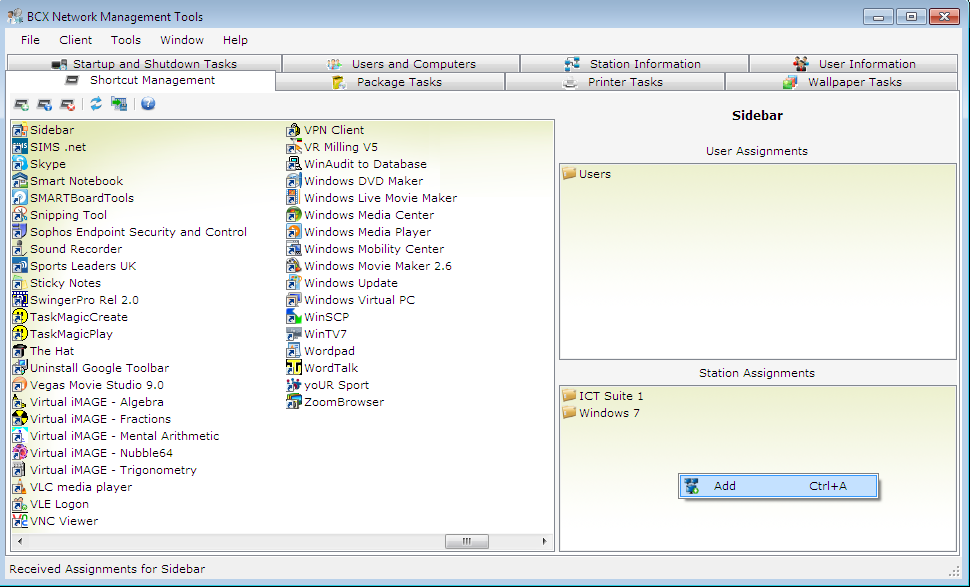
5. In the box that appears double click the OU, User or Groups you wish to assign the shortcut to so that they move to the bottom pane. Once all selections have been made, click "Save".
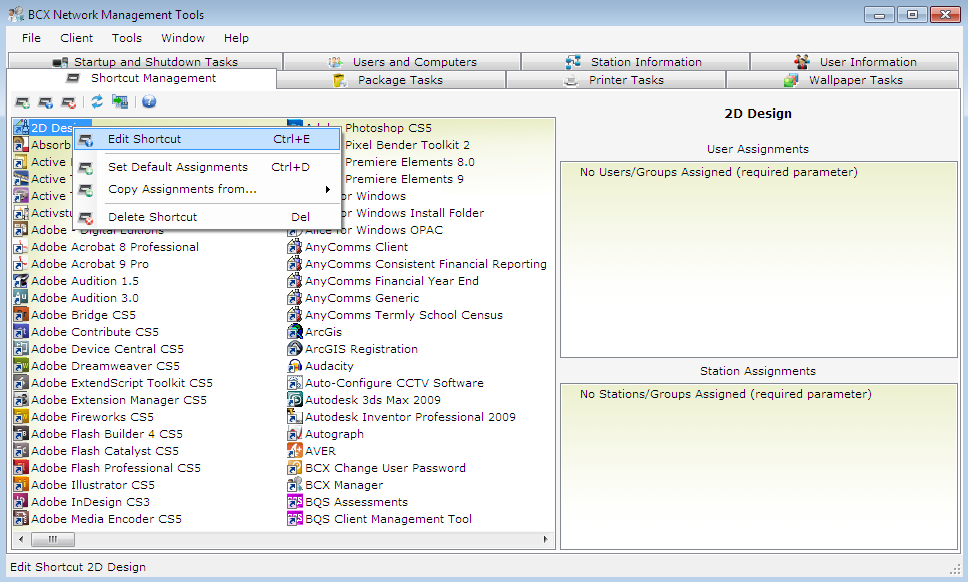
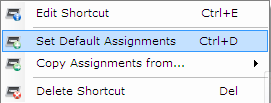
To update or edit the properties of a shortcut, right click the shortcut and select "edit shortcut"
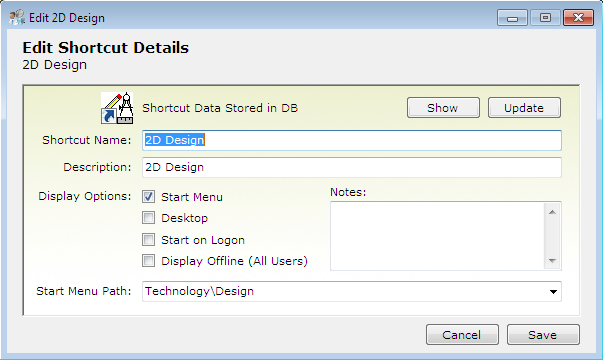
| Shortcut Name | This is the Shortcut Name displayed in the BCX Management Console |
| Description | This is the text that will be displayed along with theicon on client machines |
| Start Menu Tick Box | Select if you wish this shortcut to appear on the Start Menu |
| Desktop Tick Box | Select if you wish this shortcut to appear on the Desktop |
| Start on Logon Tick Box | Select if you wish this shortcut to AutoStart when the user logs in |
| Display Offline Tick Box | Select if you wish to allow user access when not connected to LAN |
| Start Menu Path | Use this to display shortcuts within sub groups on the Start Menu, you can either select from the drop down menu or type in a new group e.g. Microsoft Office |
| Create Default Assignments | Select this if you wish to auto assign the shortcut to your default users and stations. The defaults were set at installation but can be change from the Tools menu at any time |
1.3 - Default Assignments
Instead of individually setting assignments for every shortcut, you can set default assignments.
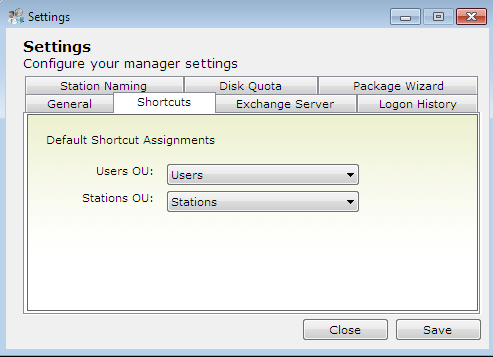
Click Tools -> Settings. Then select the shortcuts tab
1.4 - Replacing Shortcuts
If you need to change the Path of a shortcut, if the program is moved for example, Double click on the Shortcut to bring up the edit screen.

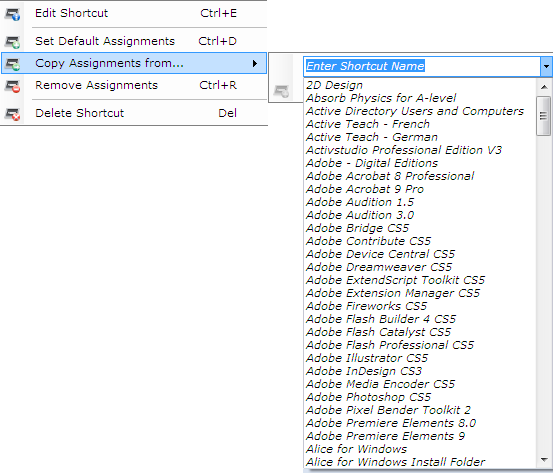
1.5 - Copying/duplication of Assignments
If you have a set of assignments for one shortcut, besides the default ones, that you want to apply to another shortcut, Right click on the shortcut and select "copy assignments from..." You can then type the name of the shortcut with the assignments you want to duplicate, or select it from the drop down list
1.6 - Delete Shortcuts
To Delete shortcuts, click the shortcut you wish to remove, and press the delete key on your keyboard.
1.7 - Exporting Shortcut list
To export your shortcuts list as a plain text file, simply click on the "Export Shortcut List" button, found in the row of buttons on the top left of the shortcut management window.
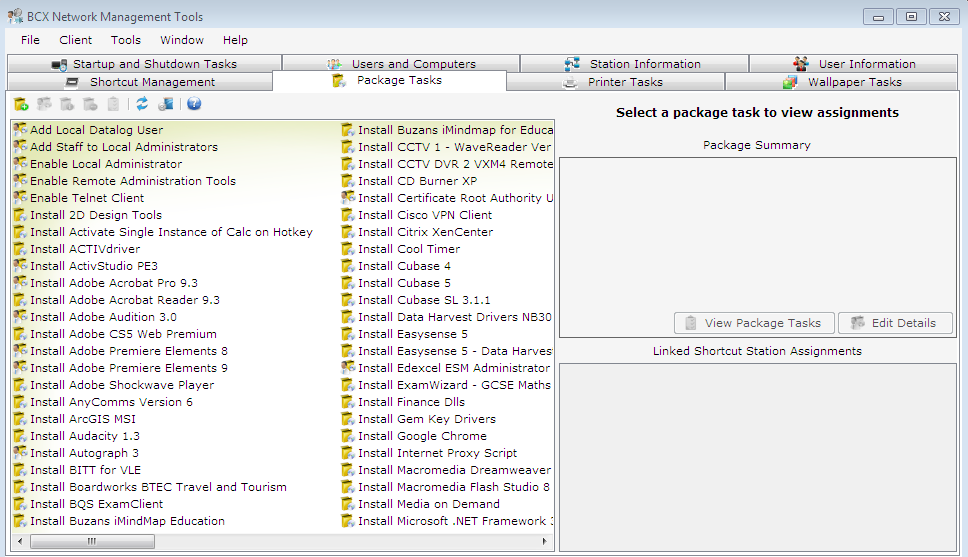
2.0 - Package Tasks Overview
Take control of Software Deployment by creating package tasks to deploy software or run custom scripts on your stations. Generate package tasks and assign the task out to station groups, organisational units, stations, or by linking the package to an existing shortcut.
2.1 - Create a Package Task
Right Click in space in the right hand pane of the Package Tasks tab
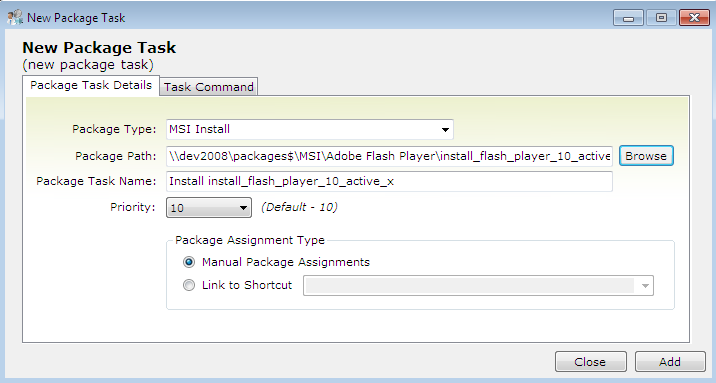
Here you can edit the Type of package
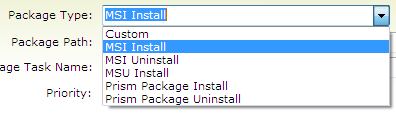
| MSI Install | |
| MSI Uninstall | |
| MSU Install | |
| Prism Package Install | |
| Prism Package Uninstall |
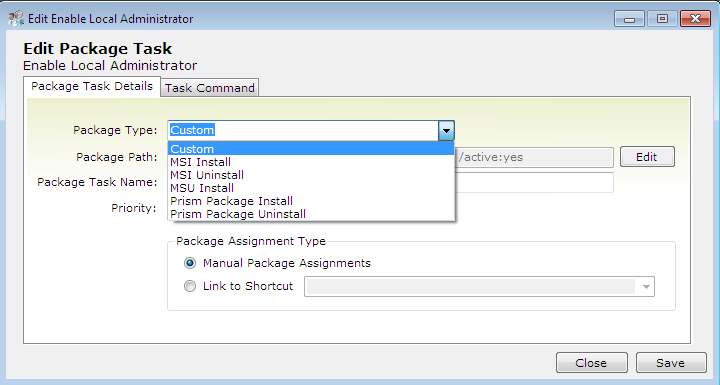
2.2 - Create a Custom Package Task
To create a custom package task, for running scripts, select "custom" from the package type dropdown menu
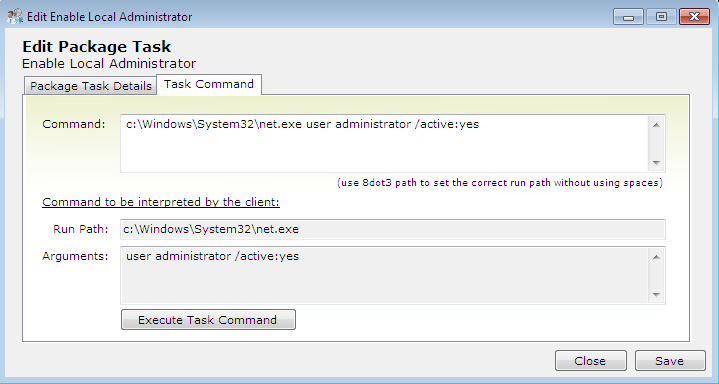
Next click the "Task Command" tab, and enter the script into the commmand box
2.2 - Edit Package Task
Right click on the package you wish to edit and select "Edit Package Task Details". You will then see the same screen as when creating a Package Task.
2.3 - Edit Package Task Assignments
Select the Package you with to edit the Assignments for in the left hand pane. Then right click in space in the "Station Assignments" pane (bottom right), click Add, then add assignments in the same way as with shortcuts
2.4 - View Package Task Status
To view the Status of a package, select it from the left hand pane, then click the "view package Tasks" button
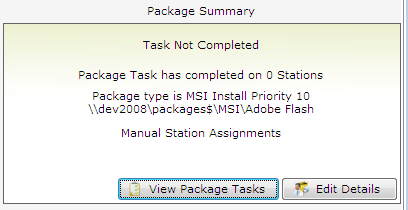
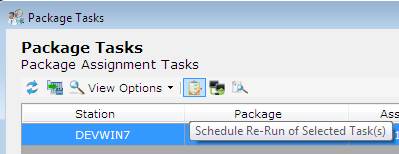
The next window shows you the stations the Package has been run on, the date, and the time of completion

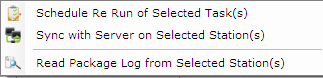
To Re Run an incomplete task on a station click the "Schedule Re-run of Selecter Task(s)" button.
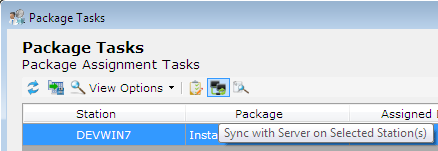
To force an update on the station click the "Sync with Server on Selected Station(s)" button
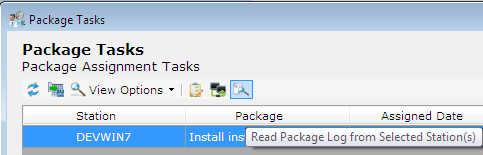
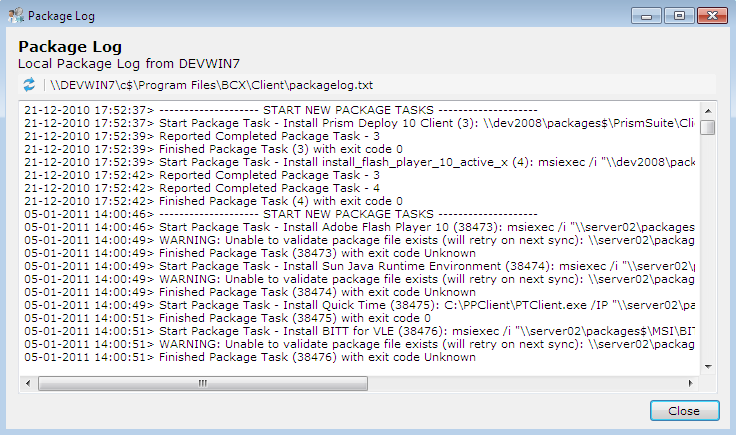
To read a stations package log from here, click the "Read Package Log" button at the top of the table
2.5 - Linking package assignments to a shortcut
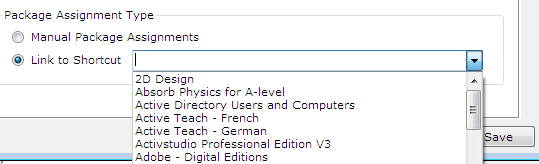
To link a Package's Assignments to a shortcut, select the package and click the "Edit Details" Button
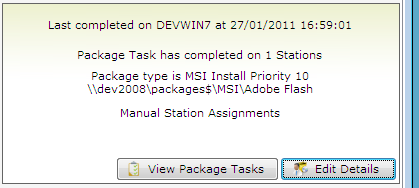
Then click the "Link to Shortcut" Button, and select the shortcut you wish to link the package to from the dropdown list. N.B This can also been done while creating the package
2.6 - Uninstalling a Package Task
If you need to Uninstall a package, select it from the left hand pane, then click the "Edit Details" button. Then change the "Package Type" e.g "MSI Install" becomes "MSI Uninstall". Next either schedule a re run for the stations to uninstall at their next start up, or sync with server (see above) for an immediate uninstallation.
2.7 - Delete a Package Task
Select the Package you wish to delete and right click on it, you can either remove just the package by selecting "Remove Package Task" or you can remove the installation file at the same time by selecting "Remove Package Task and Delete File"
2.8 - Edit Package types
To edit the types of Package that you use, click the "Edit Package Types" button at the top of the package tasks window
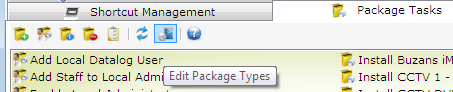
You will then see the "Edit Package Types" window.
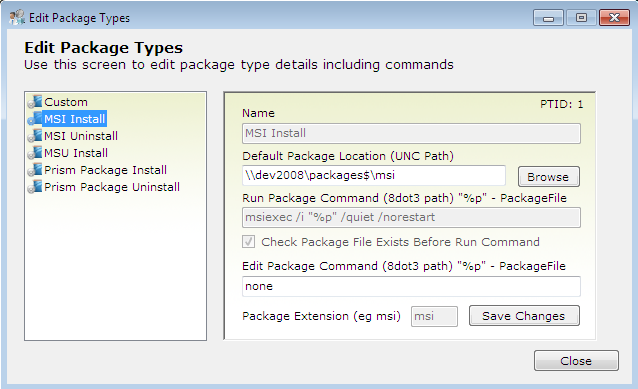
To add a new package right click in the left hand pane, then select new. Name the package, set the location on the server of the setup file, e.g the .msi file. Then if using a custom type, enter the Command to run the package. In this field %p represents the path to the setup file (rarely used). Then set the extension for the package. Click "save changes" before closing.
2.9 - View Pending Package Tasks
Click Tools, then "View Pending Package Tasks".
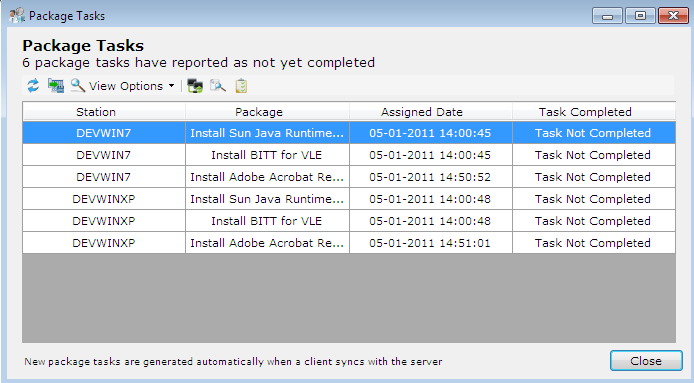
From this window you can sync with the server, read package logs and delete package tasks by using the buttons at the top of the table
3.0 - Printer Tasks Overview
The Printer Tasks Overview can be used to assign different groups of users or computers to different printers
3.1 - Create a Printer Task
To create a new Printer Task, select the printer tasks tab. Next right click in the open space on the left hand pane, and select "New Printer Task" from the menu.
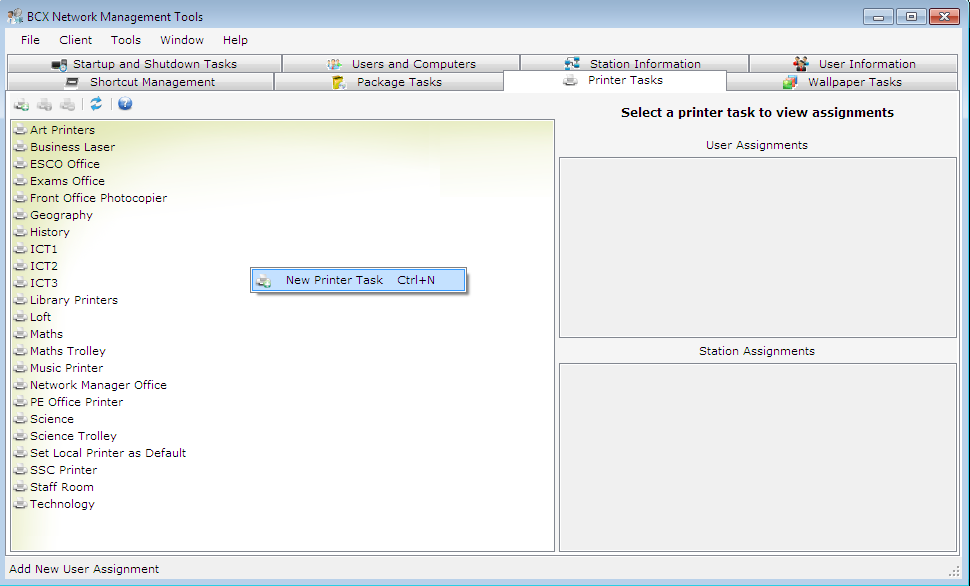
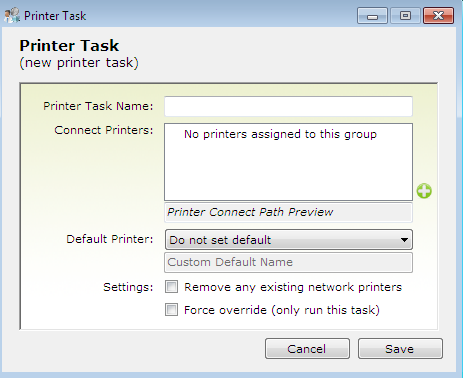
The next window shows a list of installed printers, you can add as many as you like.

3.2 - Edit Printer Task Options
Select the printer task from the list that you wish to modify, right click on it, and select edit. You will then be faced with the same screen as when setting up a new printer task.
3.3 - Edit Printer Task Assignments
Just like editing the Shortcut Assignments, select the printer you wish to assign Users and stations to, right click in either field and select Add.
N.B Unlike shortcuts, printers must be assigned to both the workstations that will be allowed to use them, and the group of users who will be able to use the printers
3.4 - Default Local Printer (custom default)
If you have a locally installed printer connected to a workstation and wish to set that as the default printer, right click on the printer task and select edit. Then change the value of the "default printer" drop down menu to "Custom Default"

3.5 - Delete a Printer task
select the printer task you wish to delete and press the delete key
4.0 - Wallpaper Tasks Overview
The Wallpaper Tasks window allows you to assign specific wallpapers to users, stations and/or groups
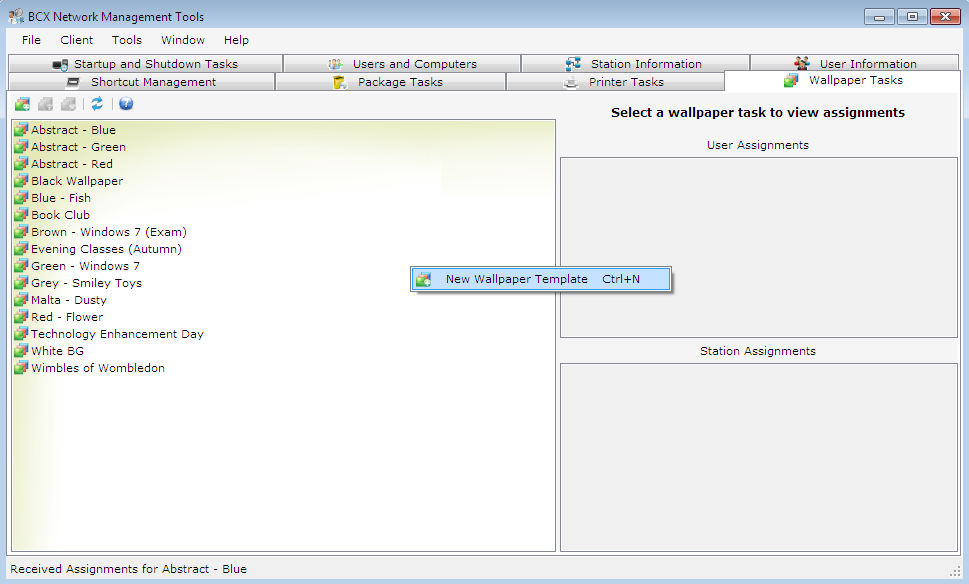
4.1 - Create a Wallpaper Task
Right click in the open pane on the left of the window and select "New Wallpaper Template"

4.2 - Edit Wallpaper Task Options
Right Click on the Task you wish to edit, and select edit from the menu. Then you will be faced with the same screen used to create the Wallpaper Tasks.
4.3 - Edit Wallpaper Task Assignments
Right click on the Assignments you wish to edit, or to create new ones right click in the empty space and then select which Users or Stations like when creating a wallpaper task
4.4 - Delete a Wallpaper Task
Select the Task to be removed and press the delete key
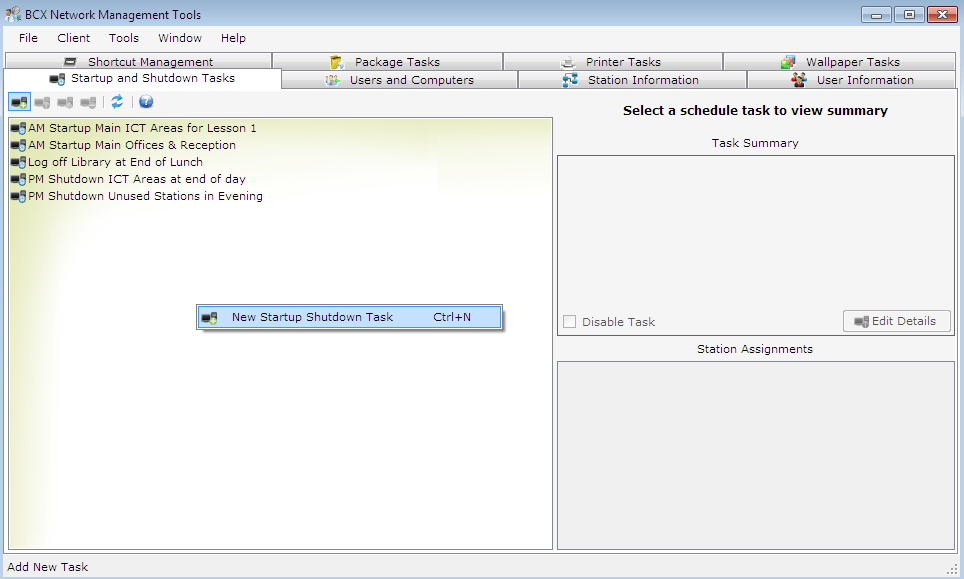
5.0 - Startup Shutdown Task Overview
The Startup and Shutdown Task window allows you to set groups of workstations to startup, shutdown, restart or log off at any given time of day
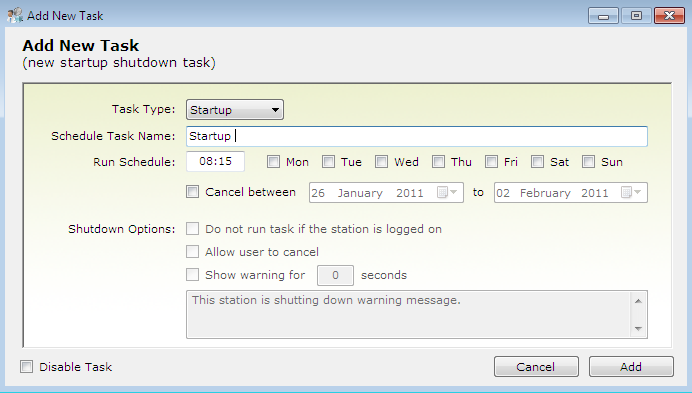
5.1 - Create a Startup Shutdown Task
Right click in the empty space on the left in the startup and shutdown tab and select new task from the menu
5.2 - Edit Startup Shutdown Tasks
Right click on the task you wish to edit, and you will see the window used to set up the task where you can edit all the various parameters.
5.3 - Edit Startup Shutdown Task Assignments
Right click in the Assignments pane, and select Add to set up a new assignment, or right click on one that has already been selected and click remove to remove it.
5.4 - Delete a Startup Shutdown Task
Select the Task from the pane on the left and press the delete key
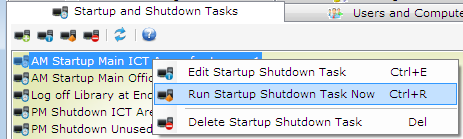
5.5 - Test a Startup Shutdown Task
To test a Startup Shutdown Task, right click on it an select "Run Startup Shutdown Task Now"
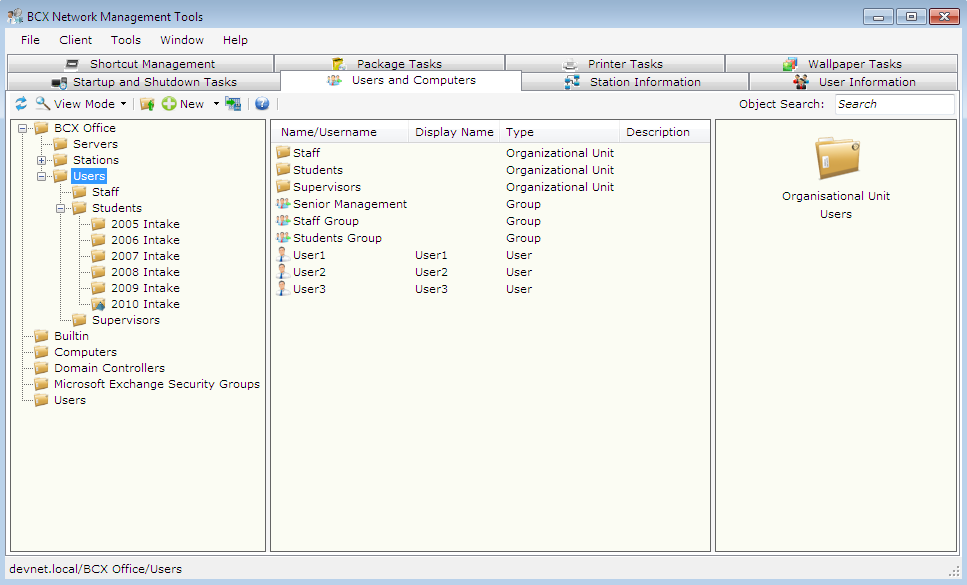
6.0 - Users and Computers Overview
The Users and computers tab allows you to control how users and computers are assigned to groups and OU's
6.1 - Create and edit templates
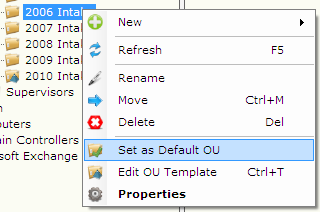
To Create or edit a user template, right click on the OU and select "Edit OU Template"
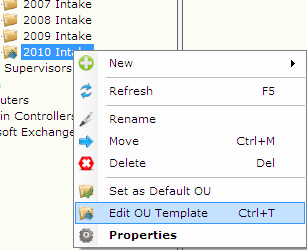
The blue icon seen on the 2010 Intake folder indicates a template already exists, whereas the 2009 intake does not have an existing template
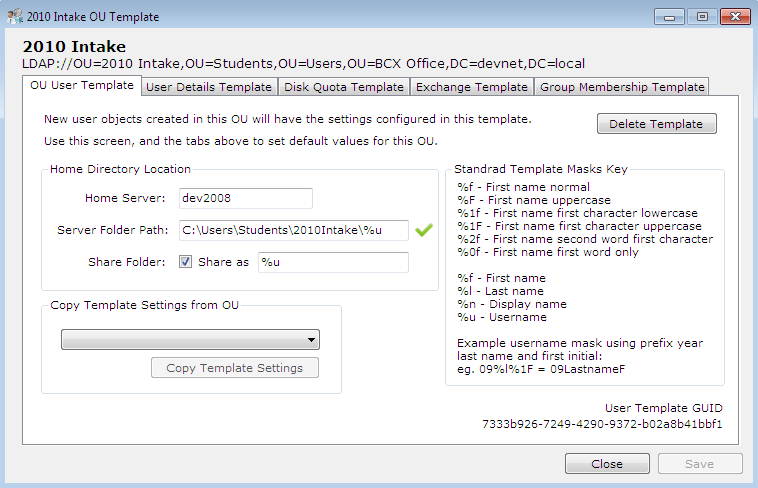
The "OU User template" tab allows you to edit the home directory for all users in the OU, a brief explanation of mask keys is shown on the right. There is also the option to copy a template from another OU.
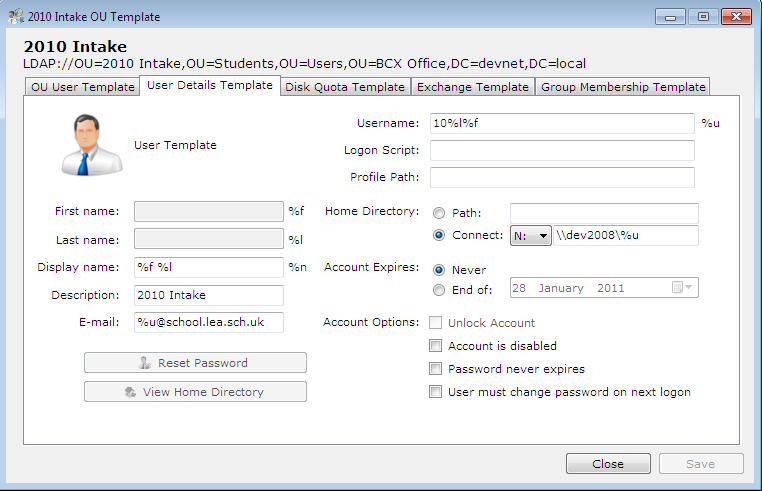
The "User Details Template" tab allows you to edit how usernames, display names and emails are assigned. You can set an expiry date for the accounts or passwords
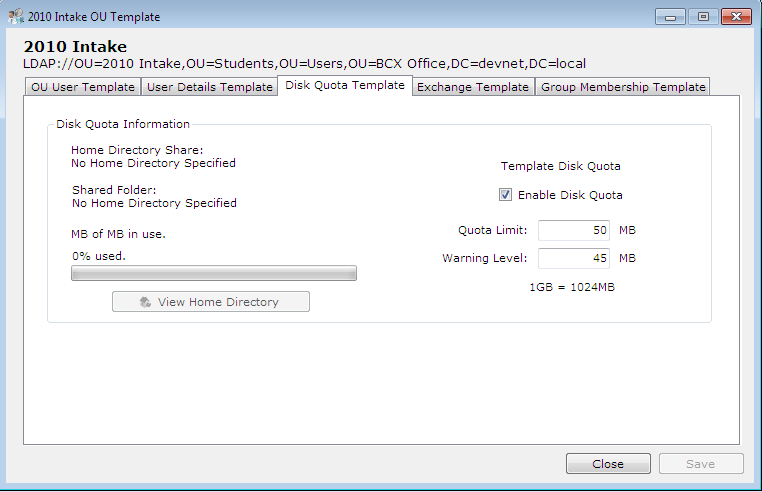
The "Disk Quota Template" tab lets you set the amount of disk space users in the OU will get, when they will be warned they are close to their limit.
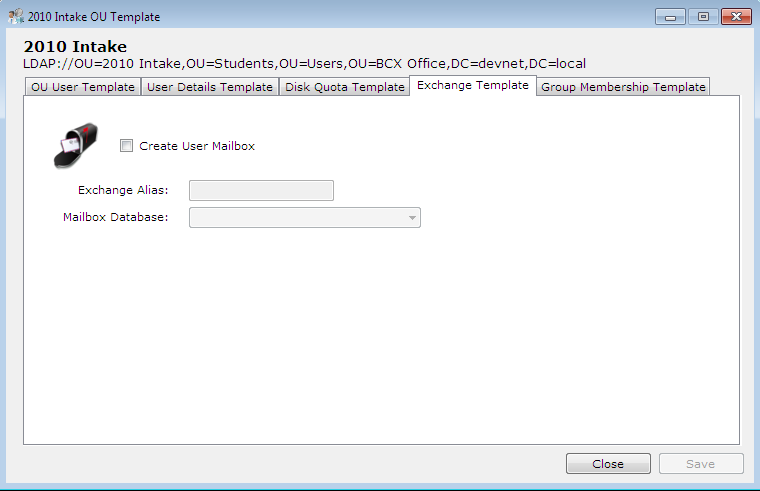
The "Exchange Template" tab allows you to set up mailbox's for the OU.
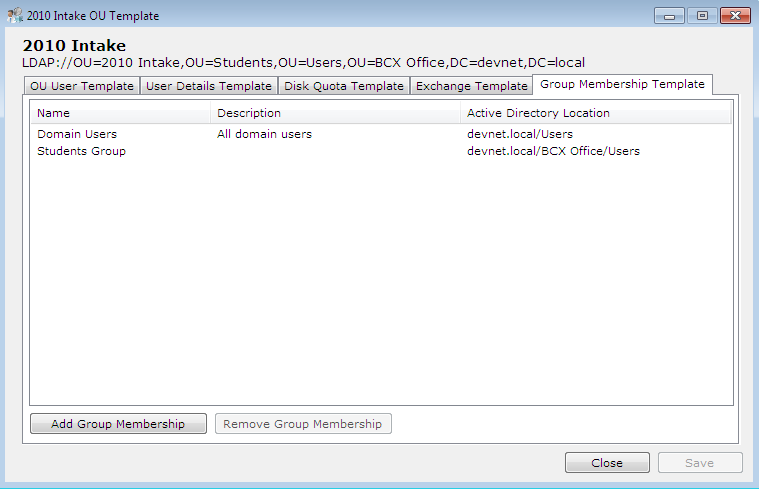
The "Group Membership Template" tab allows you to view and set which groups are assigned to the OU. Select "Add Group Membership" to add groups.
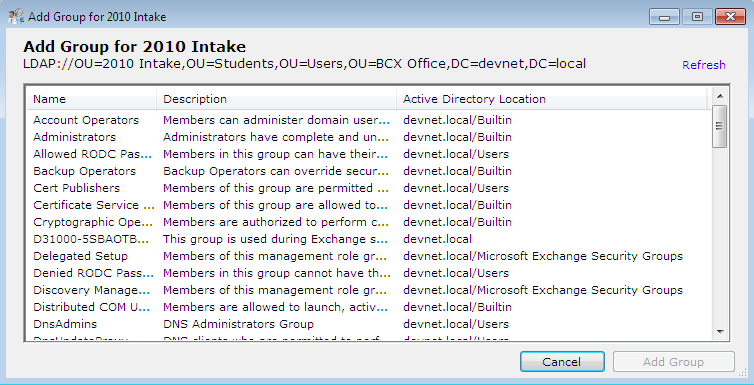
Select a group from the list and click "Add Group"
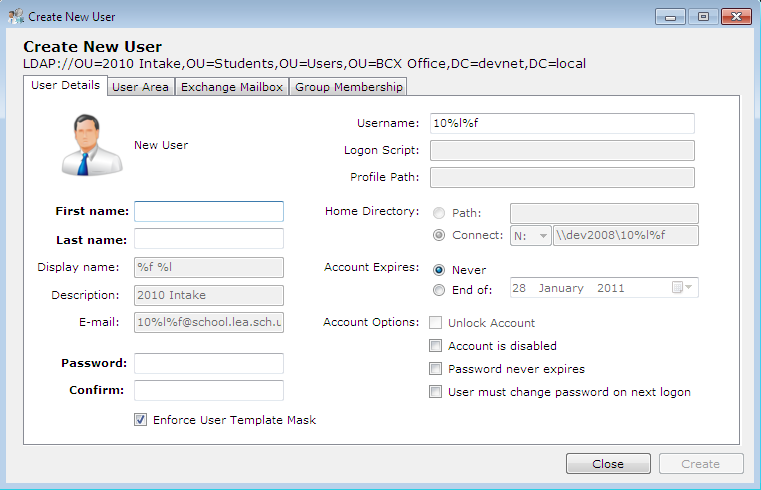
6.2 - Create new users
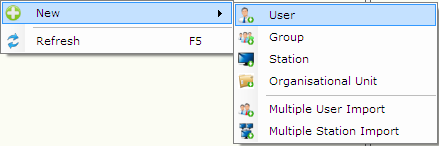
To create new users, select the OU you want them to be a part of and right click in the central window, select "New" then "User"
If a template has already been made for the OU then very little data needs inputting, only the First and Last Names of the user, password and you can also add the specific user to any other groups that the whole OU are not members of.
6.3 - Create new OU
To create an OU, right click, select "new", then "Organisational Unit"
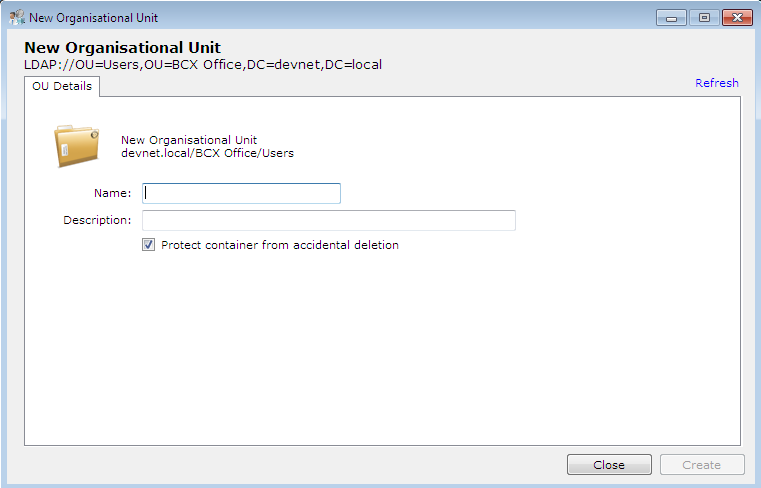
Then enter the name of the OU, description and you can choose to protect it by checking the "protect container from accidental deletion" box.
6.4 - Create new group
For ease of organisation, it is suggested that first of all you create an OU named "groups" (see previous step). Then right click, select "new", then "group"
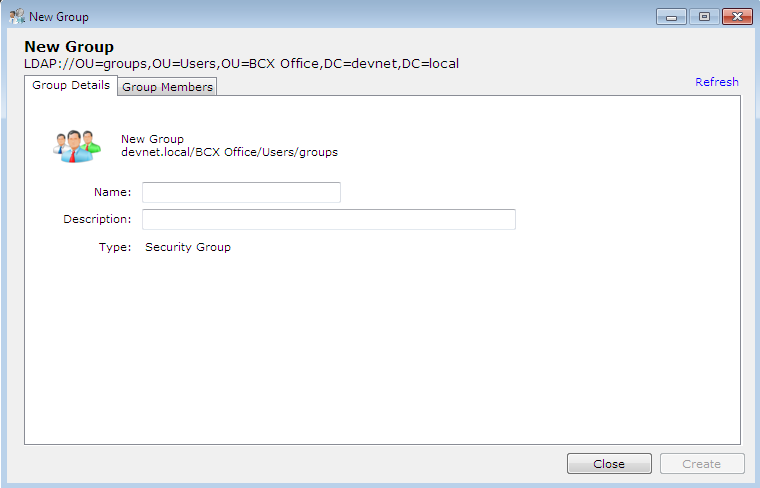
Then enter the group name and description. The "group members" tab can then be used to add members
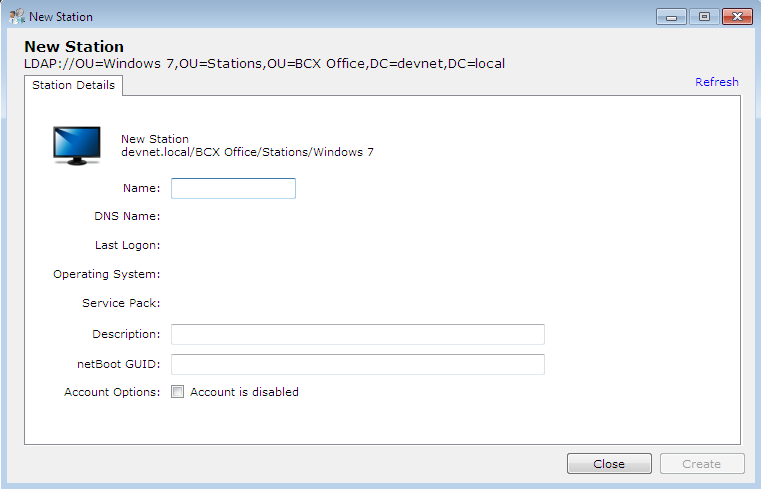
6.5 - Create new station
To create a new station, right click, select "new", then "station"
6.6 - Multiple user import
Select the OU you wish to add multiple users to, right click in the central pane, select "new", then "Multiple User Import"
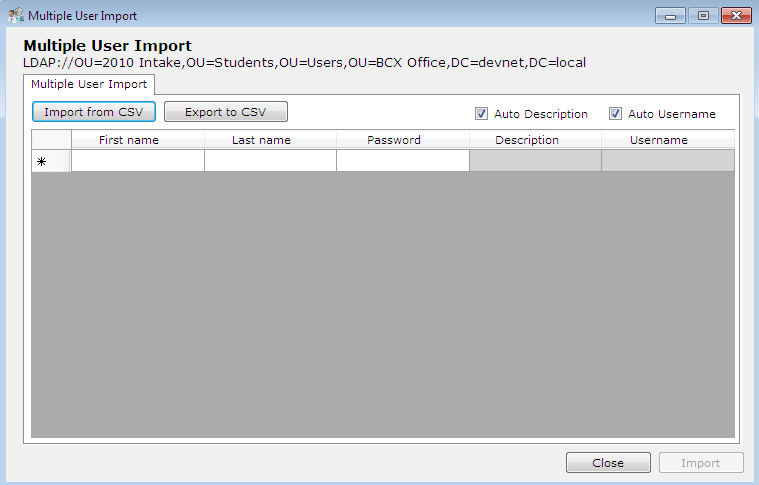
Users can either be entered manually, or if you have a CSV file, you can import it by selecting "Import from CSV"
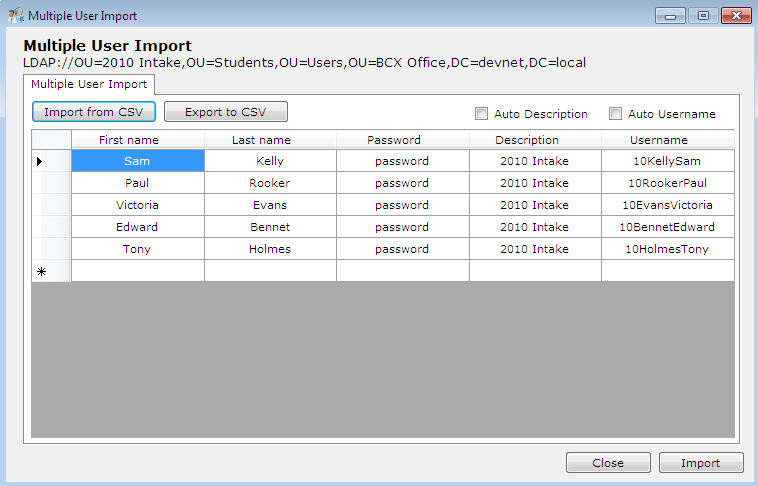
When finished click "Import", you will be notified when it is complete, then click "close".
6.7 - Multiple station import
Select the OU you wish to add multiple stations to, right click in the central pane, select "new", then "Multiple Stations Import"
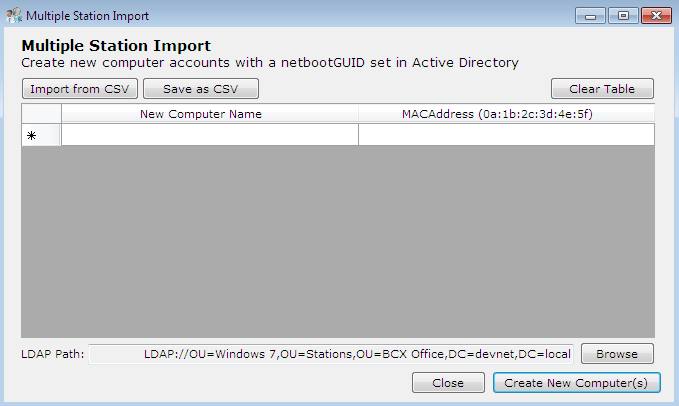
Just as with mass importing users (previous step), you can either enter the computer names and MAC addresses manually, or import from a CSV file.
6.8 - Reset user password
Find the user you wish to reset the password for, right click on them and select "reset user password"
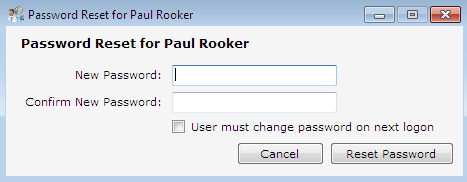
Enter a new password for the user, you can also force the user to change this password when they next logon by checking the box
6.9 - Edit user quota
Right click on the user you wish to edit the quota for, then select properties.
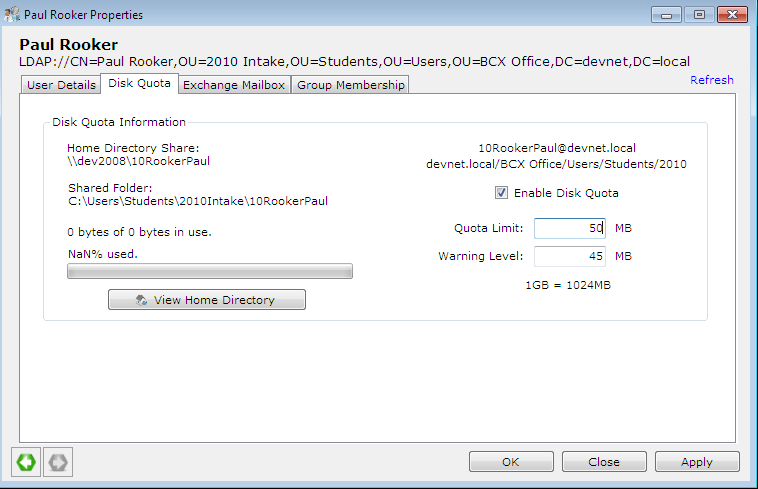
You can then change the quota limit, and the warning level
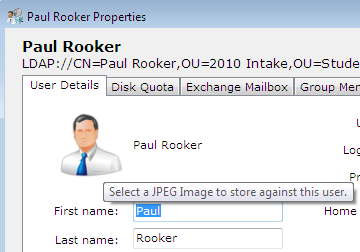
6.10 - Store user image
You can add a custom image to a users account, E.G a photo, by bringing up the properties screen and clicking on the picture above the name field
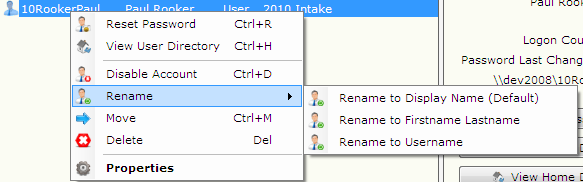
6.11 - Rename user object
To Rename a user, right click on them and move to "Rename"
6.12 - Delete user object
To delete a user, right click on them and select "delete"
6.13 - Enable/Disable accounts
To Disable and account, right click on it and select "Disable Account". Similarly, to enable a previously disabled account, right click and select "Enable Account"
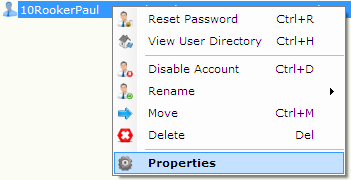
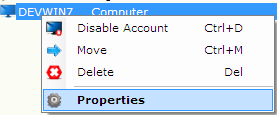
6.14 - Edit user object
Right click on the user to edit, and select "Properties"
6.15 - Edit station object
Right click on the station to edit, and select "Properties"
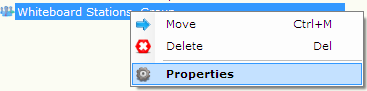
6.16 - Edit group object
Right click on the group to edit, and select "Properties"
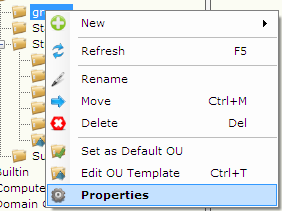
6.17 - Edit OU object
Right click on the OU to edit, and select "Properties"
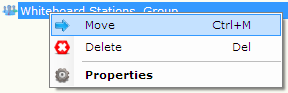
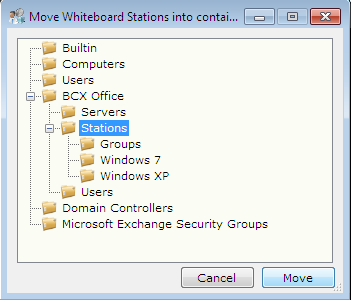
6.18 - Move objects
Objects can either be moved by dragging and dropping, or by right clicking and selecting "Move"
Next select the folder to move the object to and click "move" to confirm.
6.19 - Delete Objects
To delete an object either select it and press the "Delete" key or right click and select "Delete" from the list. N.B OU's that have been protected from deletion need to be unprotected first.
6.20 - Exporting object list
To export the object list, click the "Export Current Object List To Text File" button above the left hand pane

6.21 - Set default OU
Setting the default OU changes the OU that is first shown when the "Users and Computers" tab is selected. Right click on an OU and select "Set as Default OU"
7.0 - Station Information Overview
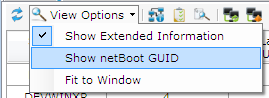
The Station Infomation overview window allows you to see various infomation about the stations that are in the network

To add GUID information to the table, click "view options" then "show netBoot GUID"
7.1 - Searching by Name, Serial and MAC
If you know the Name, Serial Number, or MAC Address of a workstation you wish to find, you can use the text box in the top right corner to enter it, and the dropdown box to select Name, Serial or MAC address

7.2 - View Station Package Tasks and Logs
To view the Package history of a station, right click on it, and select "view package tasks"
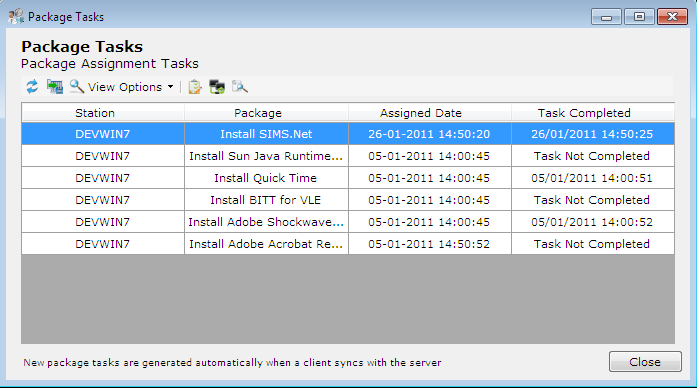
From here you can see what packages have been installed, the date and time they started, and if or when they were completed.
Right click on a task to view the options relating to it
To perform a Task again, select Schedule Re Run. To update the station, and re run all incomplete tasks, select Sync with Server. To view the Log file for the station, select Read Package Log.
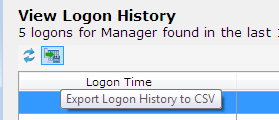
7.3 - Station Information - View Logon History
To view the logon history of a station right click and select view logon history
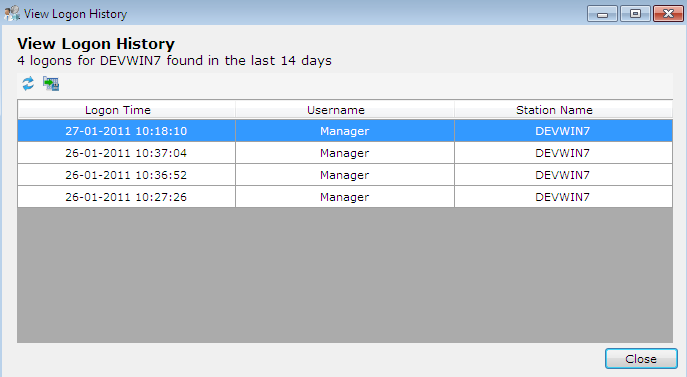
You can export this information to a CSV file, which can be opened in any spreadsheet package, click the right hand button above the table
7.4 - Right Click Options
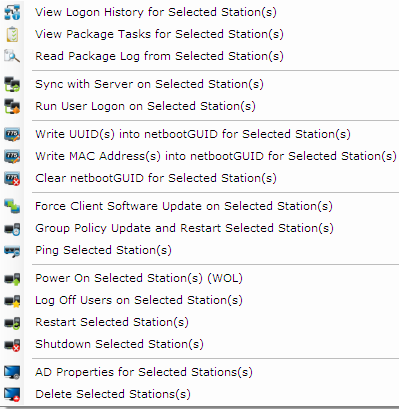
| Sync with Server on Selected Station(s) | Update the stations and re run all incomplete package tasks |
| Run User Logon on Selected Station(s) | Updates Start menu, Printers and Wallpaper, without the user needing to log off |
| Write UUID(s) into netbootGUID for selected station(s) | |
| Write MAC Address(s) into netbootGUID for selected stations(s) | |
| Clear netbootGUID for Selected Stations | |
| Force Client Software Update on Selected Station(s) | Updates any newely installed packages manually |
| Group Policy Update and Restart Selected Station(s) | |
| Ping Selected Station(s) | Verifies station responds to a Ping request |
| Power On Selected Station(s) (WOL) | Boot up a station |
| Log Off Users on Selected Station(s) | Force a log off |
| Restart Selected Station(s) | Force a restart |
| Shutdown Selected Station(s) | Force a shutdown |
| AD Properties for Selected Station(s) | View Active Directory properties |
| Delete Selected Station(s) | Remove station from database |
8.0 - User Information Overview
Use this window to view information about any user on the network. To speed up the process, the table can be sorted by clicking on the headings, or the search box in the top right can be used to search for a username
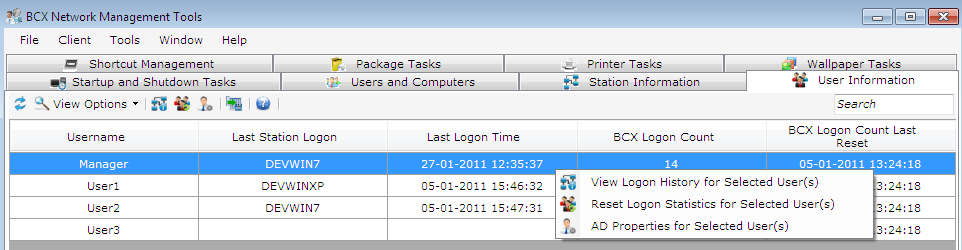
8.1 - User Information - View Logon History
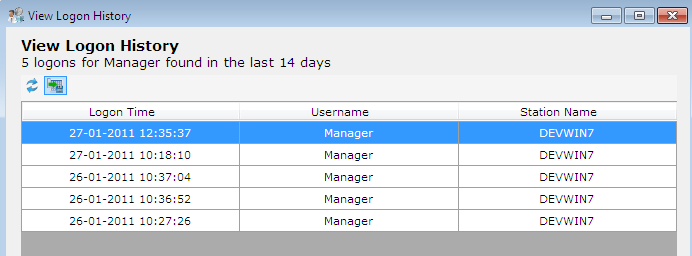
This window shows the time of logon, username and the name of the station used. This can also be exported as a CSV file for use in speadsheets
8.2 - User Information - Reset Logon Statistics
This Resets the logon counter for a user
8.3 - User Information - AD Properties
Shows Active directory properties for a user.
9.0 - Logon History Overview
Logon History records the details of every login. This can be viewed by user, station or both
9.1 - View Station Logon History
To view the history for a specific station, select the station information tab, right click on the station and select "View logon History"
9.2 - View User Logon History
To view the history for a specific user, select the user information tab, right click on the user and select "View Logon History"
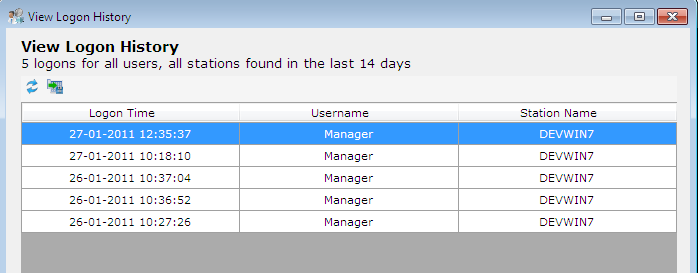
9.3 - View All Logon History
To view the logon history for all stations and users, click tools, and then view logon history.
9.4 - Configure Logon History Period
To change the settings for the logon history click tools, then settings, then the logon history tab
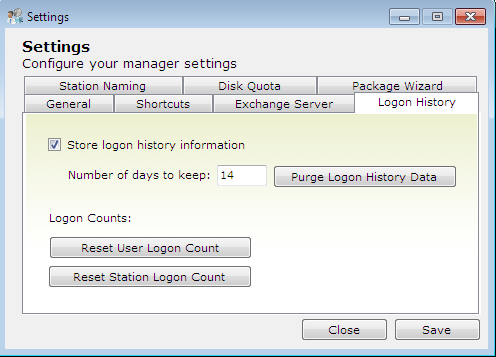
From this window you can choose how many days to store logon history, if at all. You can permenantly delete the history with the "Purge Logon History Data" button. Or you can reset the counters for Users or Station, while still keeping the logs.
9.5 - Export Logon History to CSV
From any of the Logon History windows (user, stations or all) click the right hand button in the top left corner of the window
10.0 - Package Wizard Overview
The Package wizard guides you through the process of creating a package task that will install software on your network, while also importing the required shortcuts into Shortcut Management.
10.1 - Create a Package using the wizard
To create a package wizard, click tools, then "Create Software Package Wizard"
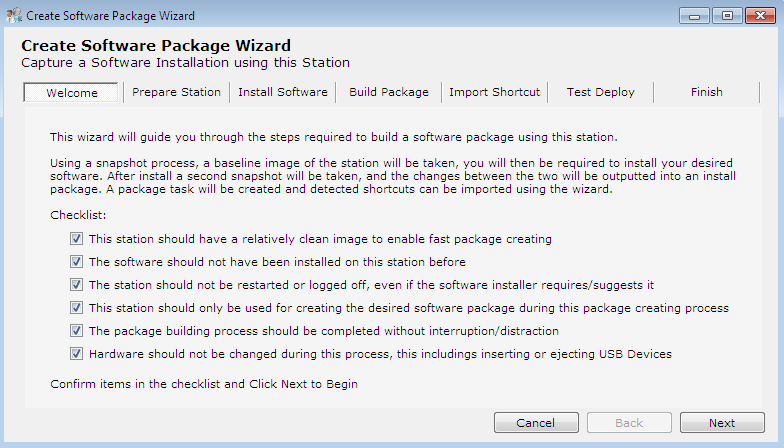
Check each of the items on the checklist before clicking "next"
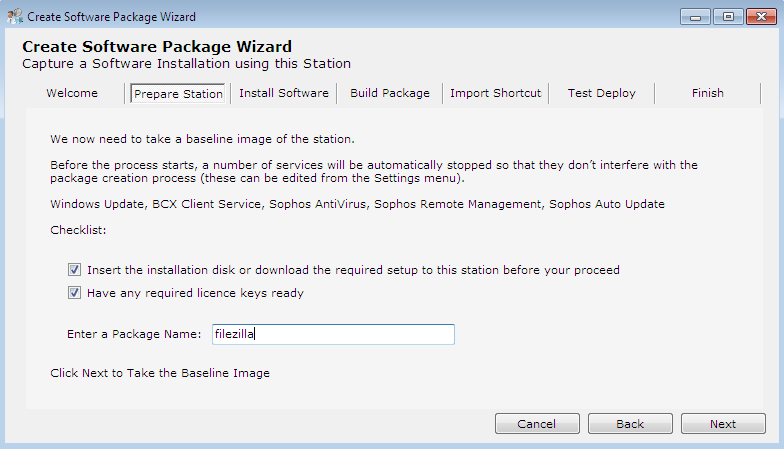
Check each of the items on the checklist, name the package and then click "Next"
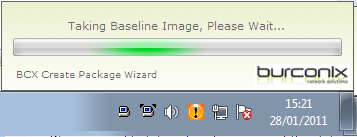
The wizard is now taking a snapshot of the machine, this may take a few minutes
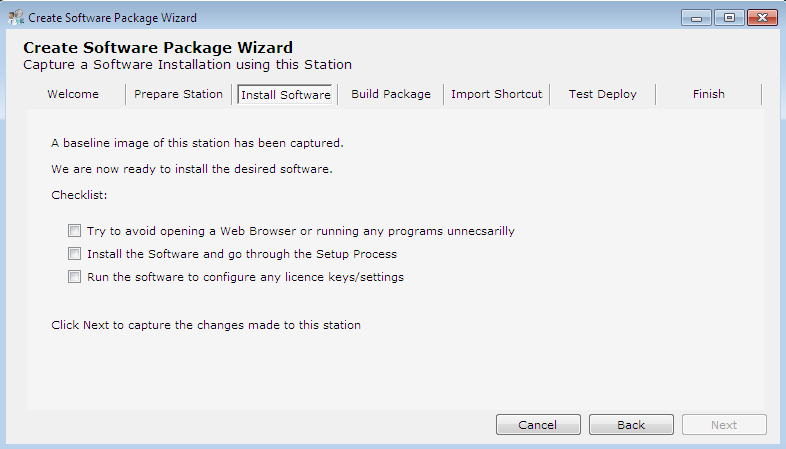
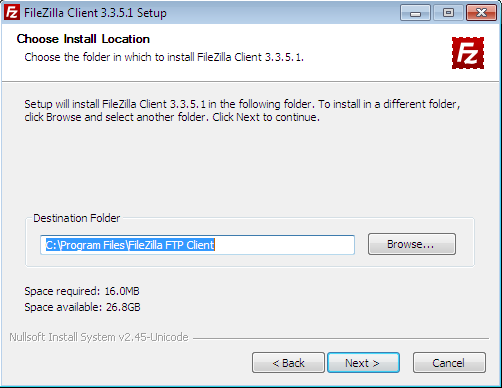
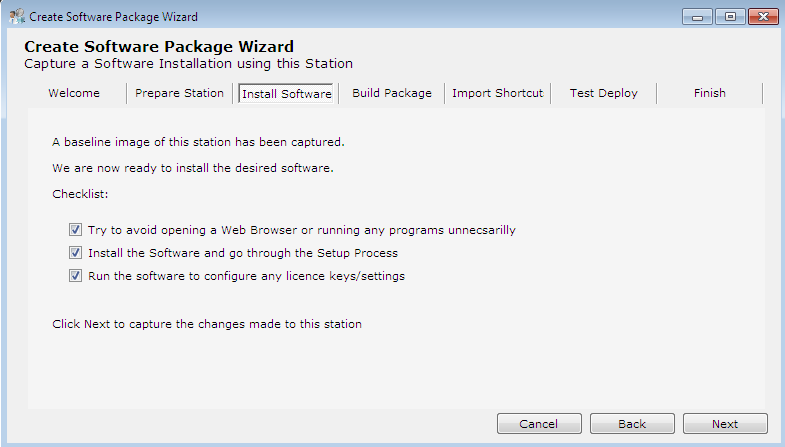
Now Install the software you want to create a package for (recomended to do one package per piece of software)
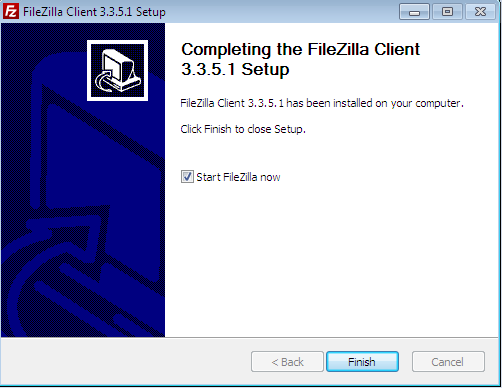
Once the Install is complete, check the "start now" button to test the software
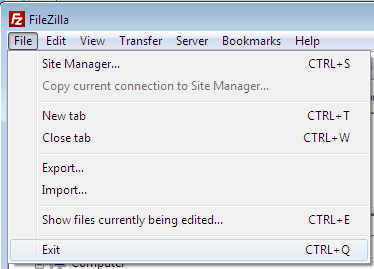
Once happy the software is working correctly, click "file" then "close"
Check the items on the checklist, when ready, click "Next"
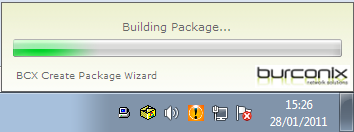
The package is now being put together, this may take a few minutes
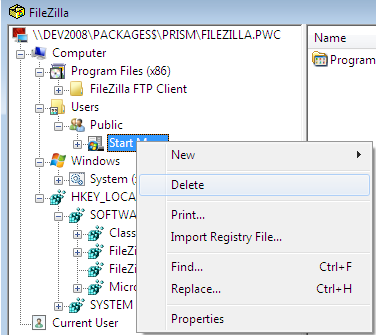
Click "Verify/Edit Package Contents" to see what has been included in the package
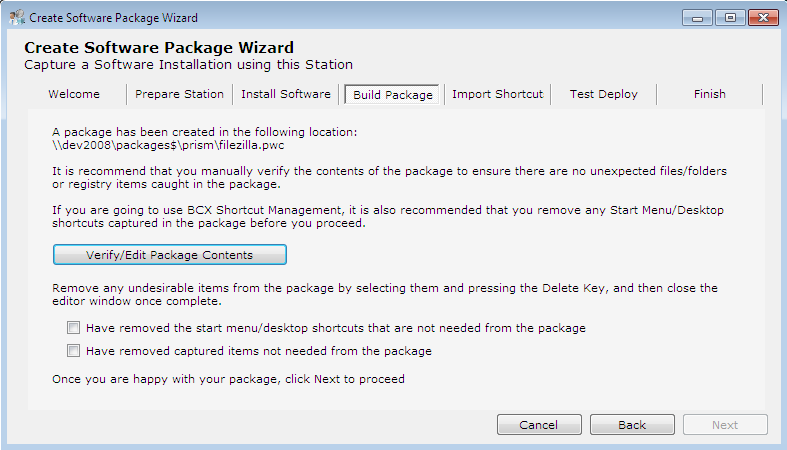
Delete the start menu shortcuts, these are dealt with separately by the shortcut management
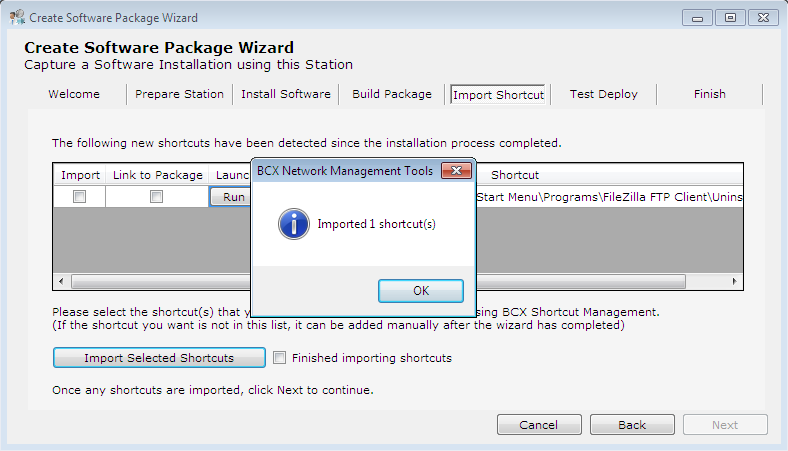
Uncheck the tick box to import the uninstall file. You can also test the shortcut by clicking the "Run" button.

When you are satisfied with the shortcuts, click "Import Selected Shortcuts", then check the "Finished Importing shortcuts" box and click next to move on
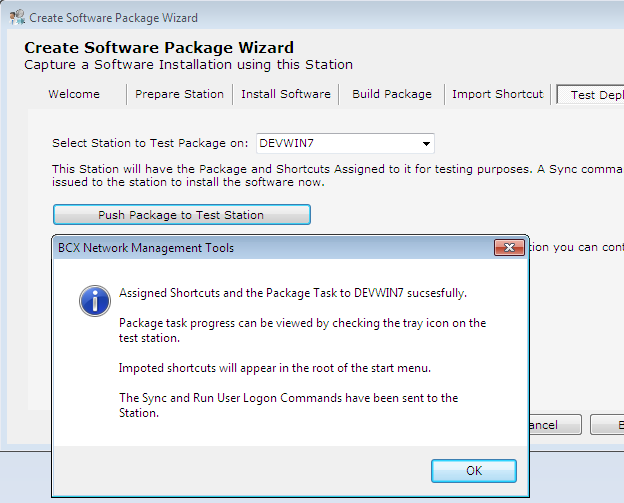
Next select a station to test the package on from the drop down menu, then click "Push Package to Test Station". Go to the test station and test that the software installed and works before clicking "OK" to move on.
The Final screen is confirmation of completion
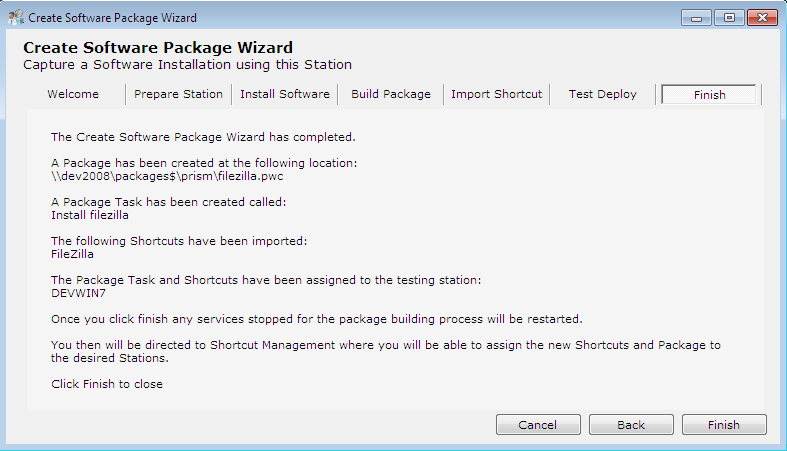
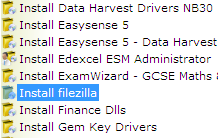
The package can then be found on the package tasks screen
11.0 - Logon Modeling Overview
The Logon modeling wizard can be used to remotely test that users can log into stations
11.0 - Run a Logon Modeling simulation
To run a Logon simulation, click Tools, then select Logon Modeling Wizard.
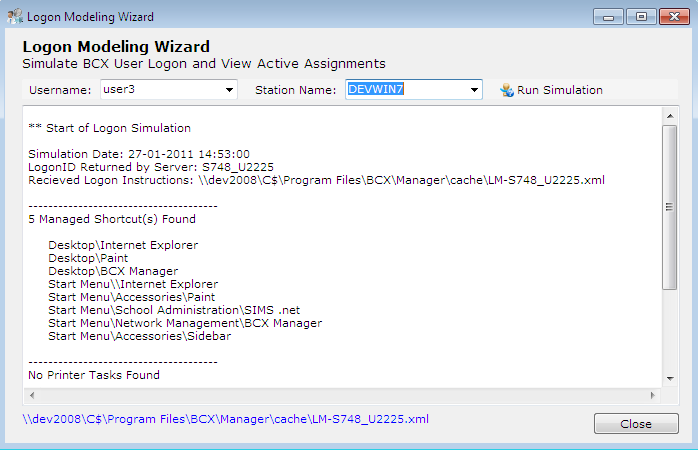
Select the username and station you wish to run the simulation for and click "Run Simulation". At the bottom of the window is the path to the log file created with the simulation data.
12.0 - Auto Naming Overview
To view the Auto Naming options click tools, then settings, and select the "Station Naming" tab
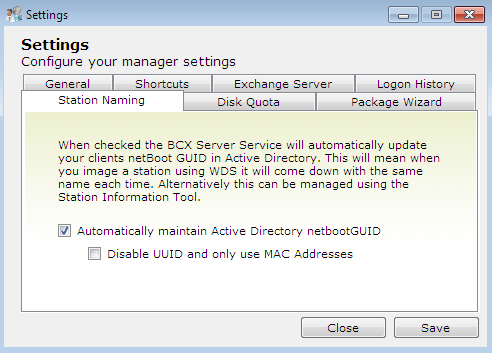
12.1 - Enable/disable Auto Naming
To Enable or Disable, check the "Automatically maintain Active Directory netbookGUID" box
12.2 - Manually setting and Clearing netboot GUID
To manually set or clear the GUID first of all Disable Auto Naming (see above) then refere to the GUID section of station information
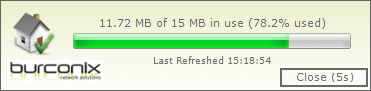
13.0 - Disk Quota Overview
text text text
13.1 - Disk Quota Settings
To set the quota for users, click tools, then settings, then select the disk quota tab

You can then set the Quota Mode between Off, Enabled using ADS home directory and Enabled using Documents path. Home directory is for the disk space on the server, whereas Documents path refers to the local stations My Documents folder. Click "Save" to confirm changes
This process may take a few minutes
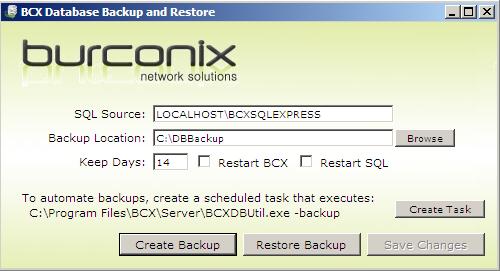
14.1 - Backup/Restore Database
From your server's desktop, run the "BCX Database Backup and Restore" Program and click the appropriate button.